Centrifugal Pump Troubleshooting Guide: Diagnosing and Fixing the Most Common Industrial Pump Problems
A centrifugal pump that is underperforming, vibrating, leaking, or refusing to prime is more than a maintenance headache — it is lost production, idle process time, and in many facilities, a safety or environmental compliance concern. The good news is that the vast majority of centrifugal pump problems follow recognizable patterns with identifiable root causes and proven corrective actions.
This comprehensive centrifugal pump troubleshooting guide covers the most common pump problems encountered in industrial manufacturing, chemical processing, water treatment, temperature control, and general fluid handling applications. For each problem, we identify the most likely causes, explain the diagnostic approach, and provide specific corrective actions — giving your maintenance team the technical foundation to resolve pump issues quickly and prevent recurrence.
Use this guide as a first-response diagnostic reference when a pump problem is reported, a root cause analysis tool for recurring failures, and a preventive maintenance planning resource to address conditions before they cause unplanned downtime.
How to Use This Troubleshooting Guide
Effective pump troubleshooting follows a systematic process. Before diving into specific symptoms, establish the following baseline information:
- What has changed? — New installation, recent maintenance, process change, fluid change, or gradual performance degradation over time each point to different root cause categories
- When did the problem start? — Immediate at startup suggests an installation or commissioning issue; gradual onset suggests wear, fouling, or a slowly developing process change
- What are the current operating conditions? — Actual flow rate, discharge pressure, suction pressure, motor current, and fluid temperature compared to design conditions
- What does the pump’s performance history show? — Comparing current performance to the commissioning baseline and to previous maintenance records reveals trend information essential for accurate diagnosis
With this baseline established, match your primary symptom to the relevant section below and work through the listed causes systematically — starting with the most common and easiest to verify before moving to more complex diagnoses.
Safety first: Before inspecting, adjusting, or working on any pump or associated piping, follow your facility’s lockout/tagout (LOTO) procedures. Confirm the pump is fully de-energized, depressurized, and drained as appropriate for the work to be performed. Never work on a pressurized pump system.
Problem 1: Pump Fails to Prime or Delivers No Flow
A centrifugal pump that fails to prime, delivers no flow at all, or loses prime after initially starting is one of the most common and most frustrating pump problems. Unlike positive displacement pumps, centrifugal pumps cannot self-prime against a dry suction line — they require liquid to be present in the pump casing and suction piping before the impeller can develop flow.
Most Common Causes and Corrective Actions
Cause 1: Pump Not Primed — Air or Gas in the Casing
The most frequent cause of no-flow at startup in a centrifugal pump is simply that the pump casing is not filled with liquid. Air or gas trapped in the casing prevents the impeller from developing any useful head — the impeller spins freely in the compressible gas rather than generating the fluid velocity that produces flow and pressure.
- Corrective action: Vent the pump casing through the casing vent plug or priming port before startup. Fill the casing completely with liquid from the suction source or via an external priming connection. Confirm that the suction valve is fully open before starting.
- Prevention: Install an automatic priming system or a foot valve at the base of the suction pipe to maintain liquid in the pump and suction line between operations. For permanently flooded suction installations, verify that suction isolation valves are interlocked to prevent startup with closed valves.
Cause 2: Suction Lift Too High — Exceeds Pump NPSH Capability
Centrifugal pumps have a fundamental limitation on suction lift — the maximum vertical distance they can lift liquid from a source below the pump. This limitation is defined by the pump’s Net Positive Suction Head Required (NPSHr) and the Net Positive Suction Head Available (NPSHa) in the system. If the suction lift exceeds what the system’s NPSHa can support, the pump cannot develop flow regardless of how well it is primed.
- Corrective action: Calculate actual NPSHa for the installation — accounting for static suction lift, suction pipe friction losses, fluid vapor pressure at operating temperature, and atmospheric pressure at the installation elevation. Compare to the pump’s NPSHr from the performance curve. If NPSHa is insufficient, lower the pump, lower the suction pipe inlet, add a larger suction pipe, or reduce suction pipe friction losses.
Cause 3: Air Leak in Suction Piping or Shaft Seal
An air leak anywhere in the suction piping — at threaded connections, flanged joints, valve packing, or the pump shaft seal — allows atmospheric air to be drawn into the suction stream, effectively breaking the vacuum required to sustain liquid flow. Air ingestion through suction leaks is a common cause of intermittent loss of prime in pumps with suction lift installations.
- Corrective action: Pressure test the suction piping system for leaks. Check all threaded and flanged connections, valve stems, and the pump shaft seal for air ingress. Apply soapy water or use a gas detector to locate active leaks under suction vacuum. Repair all identified leak points and retest.
Cause 4: Suction Strainer or Filter Plugged
A plugged suction strainer, foot valve, or suction filter restricts or completely blocks liquid flow to the pump, preventing priming and causing loss of flow. Suction strainer plugging is a particularly common cause of no-flow or loss of prime in services where the liquid contains particulates, debris, or biological growth.
- Corrective action: Check the pressure differential across the suction strainer or filter — an excessive differential indicates plugging. Remove, clean, and reinstall the strainer element. Establish a regular strainer inspection and cleaning schedule appropriate for the debris load in the service.
Cause 5: Wrong Rotation Direction
A centrifugal pump running in the wrong rotational direction will deliver little or no flow. Incorrect rotation is most commonly encountered after motor replacement, after electrical work on the motor starter or VFD, or on new installations where the motor wiring phase sequence has not been verified. Many pumps will appear to run normally when rotating backwards — the motor starts, the shaft turns, but flow and pressure are dramatically reduced.
- Corrective action: Verify rotation direction by briefly jogging the motor (momentary start) and observing shaft rotation through the coupling guard viewport or via the coupling direction markings. Compare to the rotation arrow on the pump casing. If reversed, swap any two of the three motor power leads at the motor terminal box or starter to reverse rotation. Do NOT run the pump in reverse for an extended period — reverse rotation can unscrew the impeller retention nut on pumps with threaded impeller attachment.
Problem 2: Insufficient Flow Rate or Low Discharge Pressure
A pump that runs and delivers some flow but cannot meet the required flow rate or discharge pressure is one of the most common performance complaints in industrial pump service. This symptom can result from hydraulic issues, mechanical wear, system changes, or incorrect pump selection.
| Cause | Diagnostic Indicator | Corrective Action |
| Impeller wear or corrosion | Performance below new-pump curve; gradual degradation over time | Inspect and replace worn or corroded impeller |
| Partially closed discharge valve | Low flow with normal or high discharge pressure | Fully open discharge isolation valve |
| System resistance higher than design | Motor current normal or low; pump on correct curve but flow is low | Review system curve — added piping, fittings, or process changes |
| Air or gas in pumped fluid | Erratic flow, surging, or intermittent loss of prime | Address air ingestion source; install deaeration tank if needed |
| Incorrect impeller diameter | Pump performance consistently below required — never met spec | Verify impeller trim per performance curve; replace if incorrect |
| Suction strainer partially plugged | Flow decreasing over time; low suction pressure reading | Clean or replace suction strainer element |
| Fluid viscosity higher than design | Motor overload with reduced flow and head | Review fluid properties; re-evaluate pump selection for actual viscosity |
| Speed lower than design (VFD setting) | All performance parameters proportionally low | Verify VFD frequency setpoint matches design speed requirement |
Problem 3: Pump Cavitation — Symptoms, Causes, and Solutions
Cavitation is one of the most destructive operating conditions a centrifugal pump can experience, and one of the most frequently misdiagnosed. Cavitation occurs when the local fluid pressure at the impeller inlet drops below the fluid’s vapor pressure, causing the formation of vapor bubbles. These bubbles are carried into the higher-pressure impeller passage where they collapse violently — releasing shock waves that erode impeller surfaces, cause noise, and vibration.
Left unaddressed, cavitation can destroy an impeller within weeks, produce severe vibration that damages bearings and seals, and create conditions that lead to complete pump failure.
Recognizing Cavitation — The Diagnostic Symptoms
- Characteristic noise: a crackling, rattling, or gravel-in-a-pipe sound distinctly different from normal pump operating noise — often described as pumping rocks or marbles
- Vibration: elevated vibration levels at the pump, piping, and connected structure, often with a random, irregular character
- Erratic flow and pressure readings: fluctuating discharge pressure and unstable flow rate
- Reduced performance: flow rate and head below the expected pump curve performance
- Physical evidence: pitting erosion damage on impeller vanes, impeller inlet, and pump casing visible on teardown
Root Causes and Corrective Actions for Cavitation
Insufficient Net Positive Suction Head (NPSHa)
The most common cause of cavitation is inadequate Net Positive Suction Head Available (NPSHa) — the absolute fluid pressure available at the pump suction, expressed as head, minus the fluid’s vapor pressure. When NPSHa falls below the pump’s NPSHr (Net Positive Suction Head Required), cavitation is inevitable.
- Lower the pump relative to the suction source to increase static head contribution to NPSHa
- Reduce suction pipe friction losses — increase suction pipe diameter, eliminate unnecessary fittings, shorten suction pipe length
- Lower fluid temperature if possible to reduce vapor pressure and increase NPSHa
- Reduce pump speed via VFD to lower NPSHr — pump NPSHr decreases with the square of speed reduction
- Install a booster pump upstream to increase suction pressure to the main pump
Operating Too Far from Best Efficiency Point (BEP)
Centrifugal pumps operating significantly to the left of their Best Efficiency Point (BEP) — at low flow rates — experience suction recirculation, an internal flow phenomenon that creates localized low-pressure zones at the impeller inlet that can trigger cavitation even when NPSHa appears adequate. Similarly, operating too far to the right of BEP (high flow, low head) creates discharge recirculation and similar internal flow instabilities.
- Review the system operating point on the pump curve — confirm the pump is operating within 70–110% of BEP flow
- If the pump routinely operates far from BEP due to system changes, consider re-sizing the pump for the actual operating conditions or installing a VFD to modulate speed to maintain near-BEP operation
High Fluid Temperature or Volatile Fluid
As fluid temperature increases, vapor pressure increases — reducing NPSHa for a given installation. Pumps handling hot water, process fluids at elevated temperature, or liquids near their boiling point are particularly vulnerable to cavitation. Even modest temperature increases in hot service can push NPSHa below NPSHr and trigger cavitation.
- Verify that NPSHa calculations account for actual maximum fluid temperature, not nominal or design temperature
- For high-temperature services, consider using a pump with a lower NPSHr through impeller inlet geometry optimization or larger impeller inlet diameter
Problem 4: Excessive Pump Vibration
Abnormal vibration in a centrifugal pump is both a symptom of developing problems and the cause of accelerating damage. Vibration increases bearing loads and wear rates, fatigues mechanical seal faces and elastomers, loosens fasteners, and can cause piping fatigue failures in connected systems. A vibration increase that is caught early and addressed is a minor maintenance event; the same problem ignored until failure can mean complete pump and motor replacement.
Vibration Troubleshooting by Root Cause
Cavitation-Induced Vibration
As described above, cavitation produces characteristic broadband vibration with an irregular, random character. If vibration onset correlates with changes in flow rate, suction conditions, or fluid temperature, cavitation is the most likely cause. Address per the cavitation corrective actions above.
Impeller Imbalance
A damaged, corroded, or deposits-fouled impeller that is no longer dynamically balanced produces synchronous vibration at 1x running speed — a single dominant frequency peak at the shaft rotation frequency. Impeller imbalance vibration is steady and consistent, unlike the random character of cavitation.
- Corrective action: Remove and inspect the impeller for material loss from corrosion or erosion, physical damage, or asymmetric fouling deposits. Repair, clean, or replace the impeller and confirm balance before reinstallation.
Shaft Misalignment
Misalignment between the pump shaft and the driver shaft on long-coupled units is one of the most common sources of excessive pump vibration and one of the most common causes of accelerated bearing and coupling failure. Misalignment produces vibration at 1x and 2x running speed and is often accompanied by coupling wear, elevated bearing temperatures, and periodic seal leakage.
- Corrective action: Check shaft alignment using dial indicators or laser alignment equipment per the pump manufacturer’s alignment tolerance specifications. Re-align as required. Check for soft foot (uneven baseplate contact) before performing precision alignment — soft foot makes alignment corrections ineffective and temporary.
- Prevention: Check and document alignment at every maintenance interval. Recheck alignment after any piping reconnection or baseplate disturbance — thermal growth and pipe-induced loads can shift alignment after initial setup.
Worn or Damaged Bearings
Bearing wear produces vibration at characteristic frequencies related to bearing geometry — ball pass frequency, inner and outer race frequencies — that are detectable by vibration analysis. As bearing wear progresses, vibration amplitude increases and high-frequency noise becomes audible. Elevated bearing temperature is often an early indicator of bearing distress.
- Corrective action: Vibration spectrum analysis can confirm bearing defect frequencies. Replace worn bearings promptly — continuing to run with failing bearings accelerates damage to the shaft, bearing housing, and motor windings. Investigate the cause of premature bearing failure (lubrication, contamination, overload, misalignment) before installing replacement bearings.
Resonance — Structural or Piping
If pump or piping natural frequencies coincide with operating speed or its harmonics, resonant amplification can produce vibration levels far exceeding what the rotating imbalance alone would generate. Resonance is identified by vibration that varies dramatically with small speed changes — a vibration amplitude that is highly sensitive to operating speed is a characteristic resonance indicator.
- Corrective action: Change pump speed (via VFD) to detune from the resonant frequency, or stiffen the pump support structure or piping to shift the natural frequency away from the excitation frequency.
Problem 5: Pump Overheating
An overheating centrifugal pump — evidenced by elevated pump casing temperature, hot bearings, excessive motor temperature, or fluid temperature rise across the pump — indicates an operating condition that is causing abnormal energy dissipation within the pump. Overheating accelerates seal elastomer deterioration, reduces bearing lubricant viscosity and effectiveness, and can cause thermal distortion of close-clearance pump components.
| Overheating Symptom | Most Likely Cause | Corrective Action |
| Hot pump casing, fluid temperature rise | Operating at very low flow (closed/throttled discharge) — all pump energy converted to heat | Open discharge valve; never operate with fully closed discharge for extended periods |
| Hot bearings — motor and pump end | Bearing over-lubrication, contaminated lubricant, or misalignment-induced overload | Check lubricant quantity and condition; verify alignment; replace bearings if damaged |
| Motor overheating / thermal trip | Motor overloaded — actual specific gravity or viscosity higher than design | Verify fluid properties; check motor current vs. nameplate FLA; adjust impeller trim or re-select motor |
| Elevated seal area temperature | Inadequate flush flow to seal chamber; Plan 11 orifice plugged | Check and clean flush orifice; verify flush flow rate; consider upgrading to Plan 23 with cooler |
| Uniform overheating across entire pump | Operating far from BEP; internal recirculation dissipating excess energy as heat | Review system curve; adjust operating point toward BEP; consider VFD speed control |
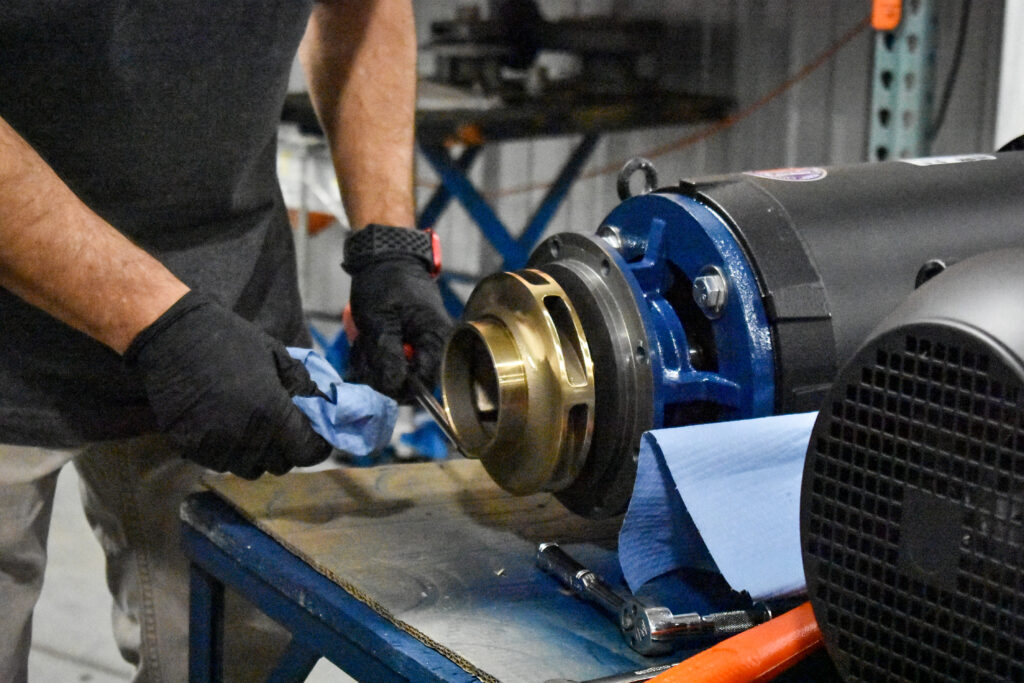
Problem 6: Mechanical Seal Leakage
Mechanical seal leakage is the most common pump maintenance issue and the leading cause of unplanned pump downtime. When a seal begins leaking beyond acceptable limits, a systematic diagnostic approach is far more effective than simply replacing the seal — because a replacement seal installed in the same adverse conditions will fail again on the same timeline.
Diagnosing the Seal Leak Path
The first step in seal leakage diagnosis is identifying which of the seal’s three sealing interfaces is the active leak path:
- Primary face leakage — liquid appears at the center of the seal gland, originating from between the rotating and stationary seal faces. This is the most common leak path and indicates face damage, contamination, or a wear condition.
- Shaft bellows or elastomer leakage — liquid tracks along the shaft, originating from the elastomeric bellows that seals the rotating face to the shaft. This indicates chemical incompatibility, thermal damage, or physical installation damage to the elastomer.
Common Root Causes of Primary Face Seal Leakage
- Dry running damage — the seal ran without liquid at the faces, causing thermal damage, face fracture, or carbon face vaporization. Common causes: pump started without priming, loss of suction, air ingestion, or system run-dry event.
- Abrasive particle scoring — hard particles trapped between the faces created radial scratches that serve as leakage channels. Inspect for scoring under magnification; address by improving fluid filtration.
- Thermal shock — rapid temperature change caused face cracking, typically visible as radial cracks in ceramic or silicon carbide faces. Common cause: cold water introduced to a hot pump, or steam ingestion.
- Wrong face material combination for the application — chemical attack, corrosion, or excessive wear rate for the specific fluid chemistry. Consult seal material compatibility data.
- Incorrect spring load — too little spring force allows faces to separate at operating pressure; too much force squeezes out the lubricating film and causes rapid wear.
Addressing Recurring Seal Failures
If seals are failing repeatedly at the same location on the same timeline, the issue is systemic — not a defective seal. Evaluate:
- Is the pump primed and full of liquid at every start? Dry running at startup is the most common cause of premature seal failure in intermittent-service pumps.
- Is the fluid free of abrasive particles? Install or upgrade suction filtration.
- Is the seal chamber being flushed adequately? Check the Plan 11 restriction orifice for plugging; verify flush flow rate.
- Is the correct seal material specified for the actual fluid chemistry and temperature? Review material compatibility.
- Is the pump operating near BEP? Severe off-BEP operation creates shaft deflection and vibration that fatigue seal faces and elastomers.
Recurring seal failures at the same pump almost always indicate a systemic operating condition issue — not defective seals. Before replacing the seal again, invest 30 minutes in root cause analysis. The answers are almost always in the operating conditions, fluid characteristics, or seal support system.
Problem 7: Motor Overload — Pump Drawing Excessive Current
A centrifugal pump motor that trips on overload, draws excessive current, or runs hot indicates that the pump is demanding more power than the motor is designed to deliver. Because centrifugal pump power consumption increases with flow rate and fluid specific gravity, motor overload conditions are almost always related to one of these two factors.
- Fluid specific gravity or viscosity higher than design — the most common cause of motor overload on new installations or after a process fluid change. Even a modest increase in specific gravity (density) significantly increases the power required. Verify actual fluid properties against the pump’s design basis.
- System resistance lower than design — if the actual system curve is lower than the design curve, the pump operates further out on its performance curve at higher flow, consuming more power than anticipated. Common causes: incorrectly calculated friction losses, pipe oversizing, or operation against a lower back-pressure than designed.
- Impeller diameter too large for the installed motor — verify that the installed impeller trim matches the motor horsepower rating on the pump performance curve.
- Mechanical binding — damaged bearings, misalignment, or impeller contact with the casing creating additional mechanical drag. Check that the shaft turns freely by hand (with the motor disconnected).
- VFD programmed to speed higher than design — verify VFD frequency setpoint against the pump’s design operating speed.
Problem 8: Premature Bearing Failure
Bearings in a correctly applied and properly maintained centrifugal pump should achieve their calculated L10 service life reliably. Premature bearing failure — bearings failing well before their expected service life — is almost always attributable to one of a small number of well-understood root causes:
Misalignment
Shaft misalignment is the leading cause of premature bearing failure in close-coupled and frame-mounted centrifugal pumps. Misalignment creates radial and axial loads on the bearings beyond their design load capacity, dramatically reducing L10 life. Even precision-aligned pumps can shift out of alignment after piping is reconnected if pipe-induced loads are not controlled. Laser alignment verification at every PM interval is the most cost-effective bearing life extension investment available.
Contaminated Lubrication
Bearing lubricant contamination — water, process fluid, dust, or metallic particles — destroys the lubricating film and causes abrasive and corrosive bearing damage. Water contamination in grease-lubricated bearings is particularly common in pump environments where seal leakage or washdown water can enter bearing housings. Sealed bearing designs, labyrinth seals, and directed bearing housing drainage minimize contamination risk.
Incorrect Lubricant Type, Quantity, or Replenishment Frequency
Using the wrong grease type, mixing incompatible greases, over-greasing (a common error that generates heat and can damage bearing seals), or under-greasing all reduce bearing life. Follow the motor manufacturer’s exact lubricant specifications — grease type, consistency (NLGI grade), and replenishment quantity and interval.
Electrical Fluting — VFD-Induced Bearing Damage
Pumps driven by Variable Frequency Drives (VFDs) can experience bearing fluting — a distinctive washboard-pattern erosion of the bearing races caused by stray electrical currents passing through the bearing. VFD-induced bearing currents are an increasingly recognized failure mode as VFD usage expands in industrial pump applications. Mitigation measures include insulated bearing housings, shaft grounding rings, and common-mode chokes on the VFD output.
Quick Reference: Centrifugal Pump Troubleshooting at a Glance
| Symptom | Most Likely Causes | First Actions |
| No flow / no prime | Not primed; wrong rotation; closed suction valve; plugged strainer | Check prime, rotation, and valve positions before anything else |
| Low flow / low pressure | Worn impeller; system resistance change; partially closed valve | Compare to pump curve; check valve positions; inspect impeller |
| Cavitation noise / vibration | Insufficient NPSHa; low flow off-BEP; high fluid temperature | Check suction conditions; verify NPSHa vs. NPSHr; check operating point |
| Excessive vibration | Misalignment; impeller imbalance; worn bearings; resonance; cavitation | Perform vibration analysis; check alignment; inspect impeller |
| Pump overheating | Throttled operation; off-BEP; bearing issues; inadequate seal flush | Open discharge; verify operating point; check seal flush flow |
| Seal leakage | Dry running damage; abrasive contamination; wrong materials; thermal shock | Inspect seal faces; check priming; verify fluid compatibility |
| Motor overload / trip | High fluid SG/viscosity; low system resistance; impeller too large; mechanical binding | Verify fluid properties; check impeller trim; measure shaft drag |
| Premature bearing failure (long coupled units) | Misalignment; contaminated lube; wrong lubricant; VFD fluting | Laser align; check lube type and quantity; consider shaft grounding |
| Noise — knocking or banging | Cavitation; recirculation; check valve slamming; loose impeller retention | Check suction conditions; verify operating point; inspect check valve |
| Noise — high-pitched whine | Bearing distress; suction recirculation; impeller clearance too tight | Check bearing temperature and condition; verify impeller clearance |
Preventing Problems Before They Start: A Proactive Pump Reliability Checklist
The most cost-effective pump troubleshooting is the kind you never have to do. These proactive practices eliminate the most common pump problems before they occur:
- Verify prime before every startup — never start a dry centrifugal pump, even briefly
- Check and document alignment for long coupled units at every PM interval and after any piping disturbance
- Monitor suction conditions — track suction pressure trends to catch developing NPSHa problems before cavitation begins
- Keep suction strainers on a scheduled cleaning program based on actual debris accumulation, not calendar time
- Track motor current at each PM interval and compare to baseline — rising current indicates impeller wear or density changes
- Inspect seal flush orifices for plugging at every PM interval
- Record pump vibration signature at commissioning and trend at every PM — vibration trending is the most reliable early warning system for developing mechanical problems
- Never operate a centrifugal pump with a fully closed discharge valve for more than a few seconds — closed-valve operation causes rapid overheating and impeller damage
- Verify fluid properties (specific gravity, viscosity, temperature) match the pump’s design basis before process fluid changes
- Maintain a spare seal and critical spare parts inventory — the cost of carrying spares is far less than the cost of emergency downtime waiting for parts
When to Call in Expert Support
Some pump problems are quickly resolved with the diagnostic framework above. Others — persistent recurring failures at the same location, unusual performance degradation, unexplained vibration profiles, or pump failures in critical service — benefit from manufacturer application engineering support. Price Pump’s technical team has decades of experience in centrifugal pump troubleshooting across chemical processing, industrial manufacturing, water treatment, and temperature control applications.
If your team has worked through this troubleshooting guide and the root cause remains unclear — or if the same pump is failing repeatedly on a short cycle — contact Price Pump’s application engineering team. We can assist with failure analysis, operating condition review, and pump selection evaluation to resolve even the most persistent pump reliability challenges. Reach us at sales@pricepump.com or 208-402-6871.
Conclusion: Systematic Troubleshooting Saves Time, Money, and Downtime
Centrifugal pump problems are rarely mysterious. The symptoms described in this guide — no flow, cavitation, excessive vibration, seal leakage, motor overload, and premature bearing failure — each have a defined set of probable root causes that can be systematically evaluated and resolved. The key is to approach pump troubleshooting methodically rather than reactively: identify the primary symptom, gather baseline performance data, work through the probable causes from most common to least common, and address the root cause — not just the symptom.
Replacing a failed component without addressing the root cause guarantees a repeat failure on the same timeline. Investing 30 minutes in systematic root cause analysis before ordering replacement parts is almost always the fastest path to sustainable pump reliability.
Price Pump manufactures centrifugal pumps, magnetic drive pumps, air-operated diaphragm pumps, and vertical pumps for industrial, chemical, and water treatment applications. Our engineering team is available to support pump troubleshooting, failure analysis, and replacement pump selection for the most demanding fluid handling applications.